Mini Animal Cracker Cookies – Chewy & Charming Treats
Mini Animal Cracker Cookies are a delightful throwback to childhood, bringing smiles and a touch of playful nostalgia to any occasion. There’s something inherently joyful about these miniature marvels, packed with the familiar crunch and subtle sweetness of everyone’s favorite animal crackers. They’re not just cookies; they’re edible art, showcasing tiny animal shapes that captivate both young and old. What makes these Mini Animal Cracker Cookies truly special is their versatility. They’re perfect for a quick afternoon treat, a fun addition to a party platter, or even a creative way to decorate a cake. We’re about to dive into a recipe that captures that pure, unadulterated happiness in every bite, proving that sometimes, the simplest ingredients can create the most memorable moments. Get ready to bake up a batch of pure joy!
Mini Animal Cracker Cookies
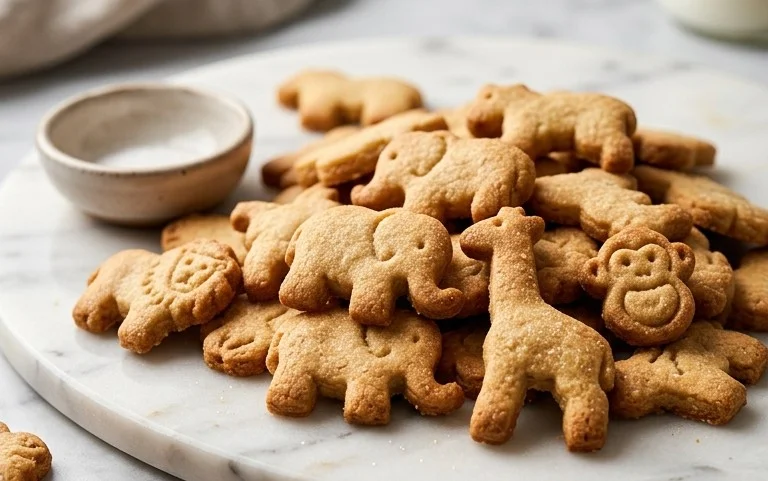
Get ready for a blast from the past with these utterly charming Mini Animal Cracker Cookies! These aren’t your average sugar cookies; they’re a delightful homage to those beloved crunchy treats that have graced lunchboxes and snack shelves for generations. We’re taking the whimsical shapes and playful spirit of animal crackers and transforming them into soft, chewy, and utterly delicious cookies that are perfect for parties, holiday baking, or just a fun afternoon in the kitchen. The best part? They’re surprisingly simple to make, and the decorating possibilities are endless, allowing your inner child (and your actual children!) to run wild with creativity. Imagine a batch of these adorning a birthday cake or being handed out as cute party favors – they’re guaranteed to bring smiles all around.
These cookies strike a wonderful balance between a classic cutout sugar cookie and the familiar taste of an animal cracker. They’re sturdy enough to hold their shape during baking but have a tender crumb that melts in your mouth. And when it comes to decorating, the sky’s the limit! Whether you opt for a simple glaze, vibrant royal icing, or a cascade of sprinkles, these mini cookies are begging to be adorned. So, let’s dive into the magic and create some edible art!
Ingredients:
- 2 and 1/4 cups (281g) all-purpose flour (spooned & leveled), plus more as needed for rolling and work surface
- 1 teaspoon ground cinnamon
- 1/2 teaspoon baking powder
- 1/4 teaspoon salt
- 3/4 cup (12 Tbsp; 170g) unsalted butter, softened to room temperature
- 3/4 cup (150g) granulated sugar
- 1 large egg, at room temperature
- 1 and 1/2 teaspoons pure vanilla extract
- Royal Icing or Easy Cookie Icing (store-bought or homemade)
- optional: food coloring*
- rainbow sprinkles
Instructions:
Step 1: Prepare the Dry Ingredients and Cream the Butter and Sugar
First things first, let’s get our dry ingredients organized. In a medium bowl, whisk together the all-purpose flour, ground cinnamon, baking powder, and salt. Whisking them together ensures that the leavening agents and salt are evenly distributed throughout the flour, which will lead to a more consistent cookie. Set this bowl aside for now.
Now, for the base of our cookies. In a large mixing bowl (or the bowl of your stand mixer fitted with the paddle attachment), cream together the softened unsalted butter and granulated sugar. You want to beat these together until the mixture is light and fluffy, which usually takes about 3-5 minutes. This creaming process is crucial as it incorporates air into the dough, contributing to the cookie’s texture and lift. The mixture should be pale yellow and significantly increased in volume. Make sure your butter is truly softened, not melted, as this will affect the creaming process.
Step 2: Incorporate Wet Ingredients and Combine with Dry
Once the butter and sugar are nicely creamed, it’s time to add the wet ingredients. Crack your large egg into a small bowl and give it a quick whisk. Then, add the whisked egg and the pure vanilla extract to the creamed butter and sugar mixture. Beat on medium speed until everything is well combined and the mixture is smooth. Scrape down the sides of the bowl occasionally to ensure all ingredients are fully incorporated. The vanilla extract will add that classic comforting cookie aroma and flavor we all love.
Now, we’ll gradually add our dry ingredients to the wet ingredients. With the mixer on low speed, add the flour mixture in two or three additions, mixing until just combined after each addition. Be careful not to overmix at this stage. Overmixing can develop the gluten in the flour too much, resulting in tough cookies. You want the dough to just come together into a cohesive ball. If the dough seems a little crumbly, you can add a teaspoon of flour at a time until it forms a dough. Once the dough is formed, turn it out onto a lightly floured surface.
Step 3: Chill the Dough and Roll it Out
This is an important step for easier handling and to prevent excessive spreading during baking. Divide the dough in half, flatten each half into a disc, and wrap them tightly in plastic wrap. Refrigerate the dough for at least 30 minutes, or up to 2 days. Chilling the dough makes it firmer and less sticky, making it much easier to roll out and cut shapes without distortion.
Once the dough is chilled and firm, preheat your oven to 350°F (175°C). Line baking sheets with parchment paper. This not only prevents sticking but also makes for easy cleanup. Lightly flour your work surface and your rolling pin. Take one disc of chilled dough and roll it out to about 1/4-inch thickness. You want to roll it evenly so that all your cookies bake at the same rate. If the dough becomes too soft while rolling, pop it back into the refrigerator for a few minutes.
Step 4: Cut Out Your Mini Animal Shapes and Bake
This is where the fun really begins! Using mini animal-shaped cookie cutters, cut out as many shapes as you can from the rolled-out dough. Gently gather the scraps, re-roll them (if needed, and chill again if they become too soft), and cut out more shapes. Carefully transfer the cut-out cookies to your prepared baking sheets, leaving about an inch of space between them. Don’t worry if your shapes aren’t perfectly identical; the charm of these cookies is in their playful variety!
Bake for 8-10 minutes, or until the edges are lightly golden and the centers are set. The baking time will vary depending on the size and thickness of your cookies, so keep an eye on them. You want them to be slightly soft in the center; they will continue to firm up as they cool on the baking sheet. Once baked, let the cookies cool on the baking sheets for 5 minutes before transferring them to a wire rack to cool completely. Trying to move them too soon can cause them to break.
Step 5: Decorate Your Adorable Mini Animal Cookies!
Once your mini animal cracker cookies are completely cool, it’s time to unleash your creativity! Prepare your royal icing or easy cookie icing. If you’re using food coloring, divide the icing into small bowls and tint them with your desired colors. You can create vibrant, playful colors or stick to more muted tones for a classic look.
Now, let your inner artist shine! Dip the cookies into the icing, spread it on with a small spatula, or use a piping bag with a fine tip to outline and fill in details. For that authentic animal cracker look, try to replicate patterns or add simple faces. Don’t forget the rainbow sprinkles! You can press them into the wet icing for extra sparkle and texture. Allow the icing to set completely before stacking or storing your masterpieces. Enjoy these delightful, homemade mini animal cracker cookies – they’re sure to be a hit with everyone!
Conclusion:
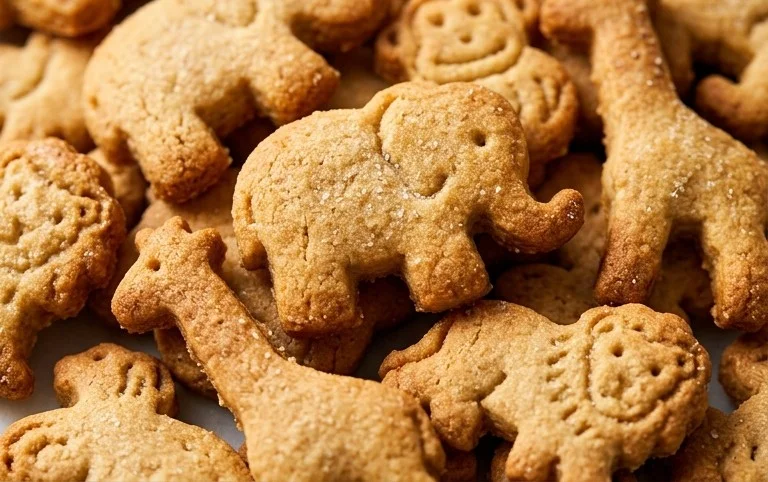
There you have it – your guide to creating the most delightful Mini Animal Cracker Cookies! These little gems are an absolute hit for so many reasons. They’re wonderfully simple to whip up, making them perfect for a quick baking project or a fun activity with kids. The satisfying crunch of the animal crackers combined with the sweet, tender cookie base creates a delightful textural and flavor experience. They are incredibly versatile and bring a playful touch to any occasion.
These Mini Animal Cracker Cookies are fantastic on their own, but they also shine when served alongside a glass of cold milk, making them a classic treat for any time of day. For an extra festive touch, try drizzling them with a little melted white or dark chocolate, or even adding some colorful sprinkles before the chocolate sets. You can also get creative with variations! Try incorporating a pinch of cinnamon or a dash of nutmeg into the cookie dough for a warm, spiced flavor, or dip the edges in colored candy melts to match a party theme.
I truly encourage you to give this Mini Animal Cracker Cookie recipe a try. It’s a guaranteed crowd-pleaser and a simple way to add a dose of joy to your baking repertoire. Let me know how yours turn out – I can’t wait to hear about your delicious creations!
Frequently Asked Questions:
How do I store these Mini Animal Cracker Cookies?
Store your cooled Mini Animal Cracker Cookies in an airtight container at room temperature. They should stay fresh and delicious for up to 5-7 days, maintaining their lovely crunch.
Can I use different types of crackers?
Absolutely! While the classic animal crackers offer a unique sweetness and fun shapes, feel free to experiment with other crunchy, lightly sweet crackers. Just ensure they aren’t too crumbly or overly salty, as this might alter the final cookie flavor and texture.
Can I make these cookies ahead of time for a party?
Yes! These cookies are perfect for making ahead. Once they are completely cooled, store them in an airtight container. They hold up beautifully for several days, making them an excellent choice for party prep.
Mini Animal Cracker Cookies
Delightful mini cookies shaped like animal crackers, perfect for parties or a fun treat. These are a simplified version of classic animal crackers.
Ingredients
-
2 and 1/4 cups all-purpose flour, plus more as needed for rolling and work surface
-
1 teaspoon ground cinnamon
-
1/2 teaspoon baking powder
-
1/4 teaspoon salt
-
3/4 cup unsalted butter, softened to room temperature
-
3/4 cup granulated sugar
-
1 large egg, at room temperature
-
1 and 1/2 teaspoons pure vanilla extract
-
Royal Icing or Easy Cookie Icing
-
food coloring (optional)
-
rainbow sprinkles
Instructions
-
Step 1
In a medium bowl, whisk together the all-purpose flour, ground cinnamon, baking powder, and salt. Set aside. -
Step 2
In a large bowl, cream together the softened unsalted butter and granulated sugar until light and fluffy. -
Step 3
Beat in the large egg and pure vanilla extract until well combined. -
Step 4
Gradually add the dry ingredients to the wet ingredients, mixing on low speed until just combined. The dough will be crumbly; if it’s too dry, add a teaspoon of water at a time. If too sticky, add a little more flour. -
Step 5
Divide the dough in half, flatten each half into a disk, wrap in plastic wrap, and refrigerate for at least 30 minutes. -
Step 6
Preheat your oven to 350°F (175°C). Line baking sheets with parchment paper. -
Step 7
On a lightly floured surface, roll out one disk of dough to about 1/4-inch thickness. Use mini animal-shaped cookie cutters to cut out shapes. Place the cutouts onto the prepared baking sheets. -
Step 8
Bake for 8-10 minutes, or until the edges are lightly golden. Let the cookies cool on the baking sheet for a few minutes before transferring them to a wire rack to cool completely. -
Step 9
Once cooled, decorate the cookies with royal icing or easy cookie icing. Add food coloring if desired. Decorate with rainbow sprinkles before the icing sets.
Important Information
Nutrition Facts (Per Serving)
It is important to consider this information as approximate and not to use it as definitive health advice.
Allergy Information
Please check ingredients for potential allergens and consult a health professional if in doubt.