Moist Pumpkin Chocolate Chip Bread Recipe
Pumpkin Chocolate Chip Bread is more than just a baked good; it’s a warm hug in loaf form, a quintessential taste of autumn that brings a smile to everyone’s face. There’s something inherently comforting about its moist, tender crumb, studded generously with melty pockets of rich chocolate. It’s the perfect balance of sweet pumpkin spice and decadent chocolate that makes this recipe a perennial favorite, whether enjoyed for breakfast, as a midday snack, or a delightful dessert. What truly sets this Pumpkin Chocolate Chip Bread apart is its incredible versatility and the way it effortlessly captures the essence of the season. It’s the kind of treat that fills your home with an irresistible aroma, making it impossible to resist a slice – or two!
Why You’ll Adore This Recipe
The Perfect Blend of Flavors
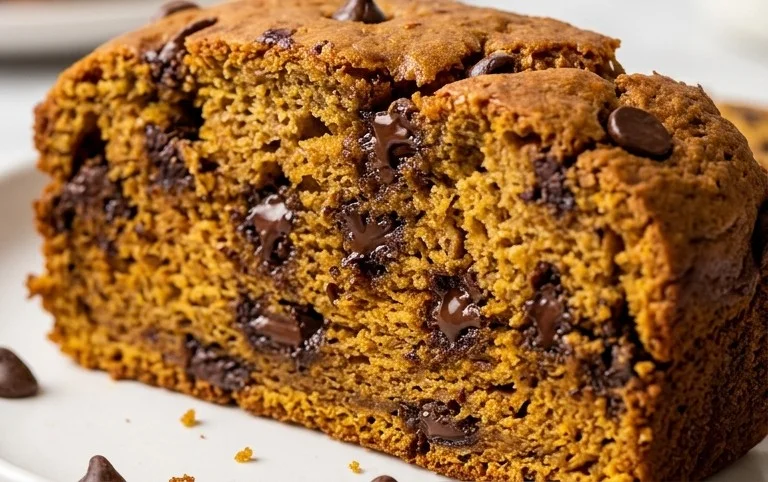
This isn’t just any quick bread; it’s a masterpiece of texture and taste. The earthy sweetness of pumpkin puree blends beautifully with the warm spices like cinnamon and nutmeg, creating a flavor profile that is pure autumn magic. Then, those glorious chocolate chips melt into gooey little surprises throughout, adding a delightful burst of richness with every bite. It’s a combination that’s both comforting and exciting, guaranteed to become a staple in your baking repertoire.
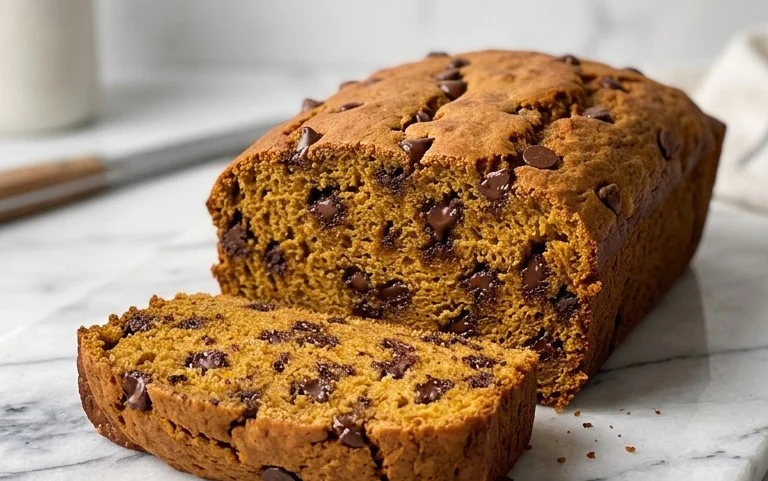
Delicious Pumpkin Chocolate Chip Bread
There’s something incredibly comforting about a warm slice of pumpkin bread, and adding chocolate chips takes it to a whole new level of deliciousness. This recipe for Pumpkin Chocolate Chip Bread is incredibly moist, packed with warm spices, and studded with melty pockets of chocolate. It’s perfect for breakfast, a snack, or even dessert. The aroma that fills your kitchen while it bakes is truly a treat in itself!
Ingredients:
- 3 cups all purpose flour
- 1 teaspoon salt
- 1 teaspoon baking powder
- 1 teaspoon baking soda
- 4 teaspoons pumpkin pie spice
- 2 cups canned pumpkin ((not pumpkin pie filling))
- ⅔ cup brown sugar
- ⅔ cup granulated sugar
- 1 cup applesauce OR canola oil
- 3 eggs (room temperature)
- 1 tablespoon vanilla extract
- 1½ cups semi sweet chocolate chips
- ½ cup mini semi sweet chocolate chips (reserve a couple tablespoons for the top of the bread if desired)
Getting Started: Preparing Your Oven and Pans
Before you even think about mixing, it’s crucial to prepare your oven and baking pans. Preheat your oven to 350°F (175°C). This consistent temperature is key for even baking. Then, grease and flour two standard loaf pans. You can use butter or cooking spray for greasing, and then dust them with a bit of flour, tapping out any excess. Alternatively, you can line your loaf pans with parchment paper, leaving some overhang on the sides. This makes removing the baked bread so much easier, preventing any sticking and ensuring beautiful presentation.
Step 1: Whisking Together the Dry Ingredients
In a large bowl, combine all of your dry ingredients. This includes the 3 cups of all-purpose flour, 1 teaspoon of salt, 1 teaspoon of baking powder, 1 teaspoon of baking soda, and the generous 4 teaspoons of pumpkin pie spice. Whisk these together thoroughly. It’s important to break up any lumps and ensure that the leavening agents (baking powder and baking soda) and the spices are evenly distributed throughout the flour. This step ensures that your bread will rise evenly and have a consistent flavor in every bite. Don’t skip this part; a good whisking here makes a world of difference.
Step 2: Combining the Wet Ingredients and Pumpkin
In a separate, equally large bowl, add the 2 cups of canned pumpkin. Make sure you are using pure canned pumpkin and not pumpkin pie filling, as the latter contains added sugars and spices that can alter the recipe’s flavor and texture. To the pumpkin, add your sugars: ⅔ cup of packed brown sugar and ⅔ cup of granulated sugar. Now, add your chosen fat: either 1 cup of unsweetened applesauce for a lighter, moister bread, or 1 cup of canola oil for an even richer, more tender crumb. Stir these ingredients together until well combined. Next, add the 3 room-temperature eggs and 1 tablespoon of vanilla extract. Room temperature eggs incorporate more easily into the batter, leading to a smoother texture. Whisk everything together until the mixture is smooth and homogenous.
Step 3: Marrying the Wet and Dry Ingredients
Now it’s time to combine the two bowls. Gradually add the dry ingredients to the wet ingredients. It’s best to do this in about three additions, mixing gently after each addition. Use a spatula or a wooden spoon to fold the ingredients together until just combined. Be careful not to overmix the batter. Overmixing can develop the gluten in the flour too much, resulting in a tough, dense bread. You’re looking for a batter that is thick but still pourable. A few streaks of flour are okay; they will incorporate as you add the chocolate chips.
Step 4: Folding in the Chocolatey Goodness
This is where the magic happens! Gently fold in the 1½ cups of semi-sweet chocolate chips and the ½ cup of mini semi-sweet chocolate chips. Again, use your spatula or wooden spoon and fold them in until they are evenly distributed throughout the batter. If you like, reserve a couple of tablespoons of the mini chocolate chips to sprinkle on top of the loaves before baking. This creates a beautiful, tempting crust. Resist the urge to stir vigorously; a gentle fold is all that’s needed to avoid breaking up the chips too much.
Step 5: Baking Your Delicious Loaves
Divide the batter evenly between your two prepared loaf pans. Smooth the tops with your spatula. If you reserved some mini chocolate chips, sprinkle them evenly over the tops of the batter in each pan. Place the loaf pans on a baking sheet (this catches any potential drips) and bake in your preheated oven for 55 to 65 minutes. The exact baking time can vary depending on your oven, so it’s important to check for doneness. You’ll know the bread is ready when a toothpick inserted into the center comes out clean, or with just a few moist crumbs attached (no wet batter). If the tops start to brown too quickly, you can loosely tent the loaves with aluminum foil for the last 10-15 minutes of baking.
Cooling and Enjoying
Once baked, remove the bread from the oven and let it cool in the pans for about 10-15 minutes. This allows the bread to set up properly. Then, carefully invert the loaves onto a wire cooling rack to cool completely. Allowing the bread to cool completely before slicing is crucial for the best texture. If you cut into it while it’s still warm, it can be crumbly and difficult to slice neatly. Once cooled, slice generously and enjoy this delightful Pumpkin Chocolate Chip Bread! It stores well at room temperature for a few days in an airtight container, or you can freeze slices for later enjoyment.
Conclusion:
I truly hope you’ve enjoyed learning how to bake this delightful Pumpkin Chocolate Chip Bread! This recipe is a winner because it strikes the perfect balance between warm, comforting pumpkin spice and the irresistible sweetness of melted chocolate chips. It’s incredibly moist, fragrant, and satisfying, making it an ideal treat for any occasion. Whether you’re looking for a festive fall bake, a delicious breakfast option, or a sweet afternoon pick-me-up, this pumpkin bread delivers every time. I encourage you to give it a try – I’m confident it will become a staple in your baking repertoire!
For serving suggestions, consider a generous slice served warm with a dollop of cream cheese frosting or a simple dusting of powdered sugar. It also pairs beautifully with a hot cup of coffee or spiced cider. Don’t hesitate to get creative with variations! You could add a sprinkle of chopped pecans or walnuts for extra crunch, or a tablespoon of molasses for a deeper, richer flavor profile. Consider adding a pinch of cinnamon or nutmeg to the topping before baking for an enhanced aroma and taste. The possibilities are endless for making this pumpkin chocolate chip bread your own!
Frequently Asked Questions:
Can I make this pumpkin bread ahead of time?
Absolutely! This pumpkin chocolate chip bread is even better the next day as the flavors meld beautifully. Once completely cooled, wrap it tightly in plastic wrap or store it in an airtight container at room temperature for up to 3 days. For longer storage, you can freeze it, either whole or in slices, for up to 3 months.
What kind of pumpkin puree should I use?
It’s best to use 100% pure pumpkin puree, not pumpkin pie filling. The pie filling contains added sugars and spices, which can alter the flavor and texture of your bread. Pure pumpkin puree will give you the most control over the final taste and consistency.
Can I make this recipe gluten-free?
Yes, you can adapt this recipe to be gluten-free! I recommend using a good quality all-purpose gluten-free flour blend that contains xanthan gum. You may need to adjust the baking time slightly, so keep an eye on it towards the end of the baking cycle.
Pumpkin Chocolate Chip Bread
Moist and flavorful pumpkin bread packed with chocolate chips.
Ingredients
-
3 cups all purpose flour
-
1 teaspoon salt
-
1 teaspoon baking powder
-
1 teaspoon baking soda
-
4 teaspoons pumpkin pie spice
-
2 cups canned pumpkin ((not pumpkin pie filling))
-
⅔ cup brown sugar
-
⅔ cup granulated sugar
-
1 cup applesauce
-
3 eggs (room temperature)
-
1 tablespoon vanilla extract
-
1½ cups semi sweet chocolate chips
-
½ cup mini semi sweet chocolate chips
Instructions
-
Step 1
Preheat oven to 350°F (175°C). Grease and flour two 9×5 inch loaf pans. -
Step 2
In a large bowl, whisk together the flour, salt, baking powder, baking soda, and pumpkin pie spice. -
Step 3
In a separate bowl, whisk together the canned pumpkin, brown sugar, granulated sugar, applesauce, eggs, and vanilla extract until well combined. -
Step 4
Add the wet ingredients to the dry ingredients and mix until just combined. Do not overmix. -
Step 5
Gently fold in the semi sweet chocolate chips and mini semi sweet chocolate chips. -
Step 6
Pour the batter evenly into the prepared loaf pans. Sprinkle reserved mini chocolate chips on top if desired. -
Step 7
Bake for 50-65 minutes, or until a wooden skewer inserted into the center comes out clean. -
Step 8
Let the loaves cool in the pans for 10 minutes before transferring them to a wire rack to cool completely.
Important Information
Nutrition Facts (Per Serving)
It is important to consider this information as approximate and not to use it as definitive health advice.
Allergy Information
Please check ingredients for potential allergens and consult a health professional if in doubt.