Easy Refrigerator Garlic Dill Pickles Recipe
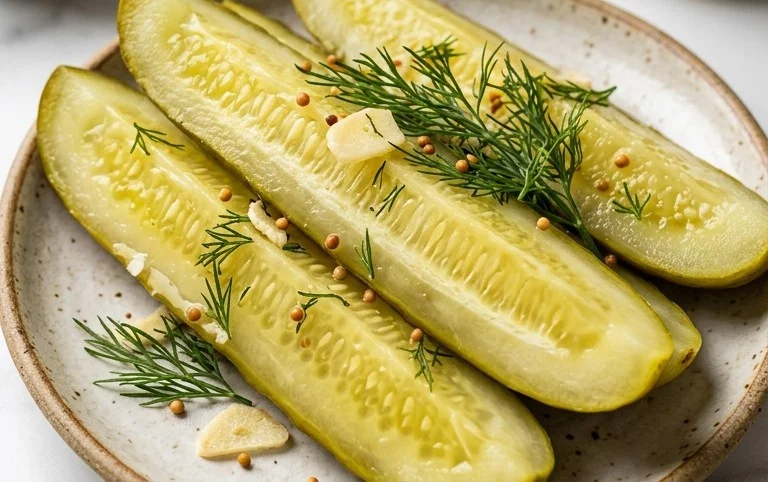
How to Make Refrigerator Garlic Dill Pickles right in your own kitchen is an incredibly rewarding culinary adventure, and frankly, one of my absolute favorites. There’s something incredibly satisfying about the crisp, tangy crunch of a homemade pickle, especially when it bursts with the pungent kick of fresh garlic and the herbaceous aroma of dill. Forget those bland, store-bought versions; these refrigerator garlic dill pickles are a game-changer. They’re incredibly simple to whip up, requiring no fancy canning equipment, making them perfect for beginners or anyone craving that instant pickle gratification. What makes them so special? It’s the vibrant, fresh flavor that permeates every bite, a direct result of a quick brine and a short chill in the fridge. These aren’t just pickles; they’re little jars of sunshine, ready to elevate sandwiches, burgers, or simply be enjoyed straight from the jar!
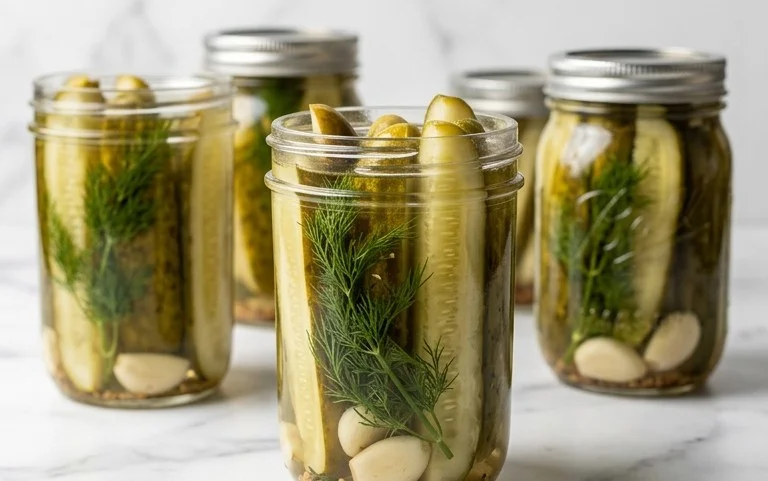
Refrigerator Garlic Dill Pickles
There’s something incredibly satisfying about a crisp, homemade pickle. While canning is a wonderful way to preserve produce, for those seeking a quicker, more accessible method, refrigerator pickles are the perfect solution. These garlic dill pickles are bursting with fresh flavor, requiring no special equipment and offering a delightful crunch right from your fridge. They are incredibly versatile, perfect as a side to sandwiches, burgers, or simply enjoyed straight from the jar. Making them is a simple process, and the results are undeniably rewarding.
Ingredients:
- 2 lbs. kirby or other pickling cucumbers
- 2 cups water (unfiltered untreated water is highly recommended)
- 1 cup 5% white vinegar
- 1 tablespoon pickling salt
- 2 cloves garlic (peeled)
- 4 sprigs fresh dill per jar
- 1 teaspoon black peppercorns (or pickling spice)
- 1/2 teaspoon hot pepper flakes (adjust for personal taste)
Instructions:
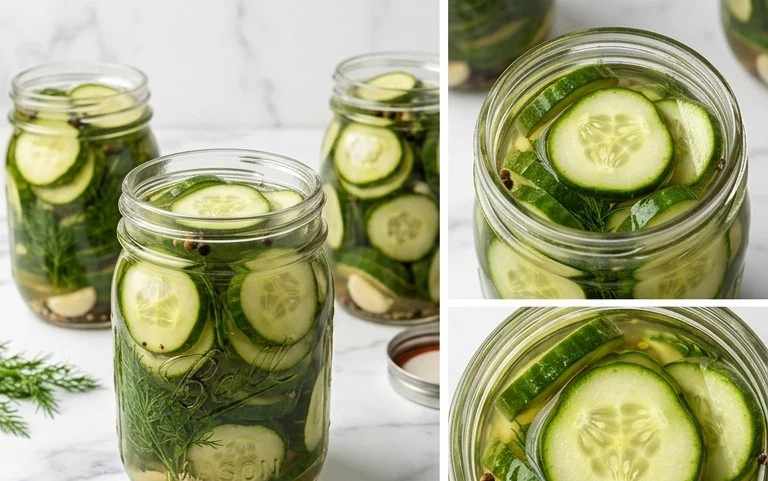
- Prepare the Cucumbers: Start by thoroughly washing your pickling cucumbers. Kirby cucumbers are ideal because they have a bumpy texture that allows the brine to adhere better, and they are less watery than slicing cucumbers, leading to a crisper pickle. If you can’t find kirbys, other pickling varieties like Boston picklers or straight-8s will work well. You can choose to leave them whole, slice them into rounds (about ¼ inch thick), or cut them into spears. For whole pickles, prick them a few times with a fork or toothpick. This helps the brine penetrate the cucumber, ensuring a more even pickling process and a better flavor. If you’re making spears or rounds, you don’t necessarily need to prick them, as their surface area is already increased. Ensure you have enough jars to hold all your prepared cucumbers; pint-sized jars are a good choice for this recipe.
- Make the Brine: In a medium saucepan, combine the 2 cups of water and 1 cup of 5% white vinegar. The vinegar is crucial for preservation and provides that signature tangy pickle flavor. Using a vinegar with at least 5% acidity is important for safety and effectiveness. Bring this mixture to a boil over medium-high heat. Once it reaches a rolling boil, stir in the 1 tablespoon of pickling salt. It’s important to use pickling salt (also known as canning salt) because it does not contain anti-caking agents or iodine, which can make your brine cloudy and your pickles dark. Continue to stir until the salt is completely dissolved. Remove the brine from the heat and let it cool slightly while you prepare your jars.
- Assemble the Jars: This is where the magic of flavor infusion happens. For each jar you plan to fill, add the aromatics. Place 1 peeled clove of garlic at the bottom of each jar. You can smash the garlic clove slightly to release more of its potent flavor, or leave it whole for a milder garlic infusion. Next, add 4 sprigs of fresh dill per jar. Fresh dill is key to that classic dill pickle taste. If you only have dried dill, you can use about 1 teaspoon per jar, but the fresh dill will impart a brighter, more vibrant flavor. Add the 1 teaspoon of black peppercorns (or your pickling spice blend) and the 1/2 teaspoon of hot pepper flakes to each jar. You can adjust the amount of hot pepper flakes to suit your preference for heat – a little goes a long way, and you can always add more if you like a spicier pickle.
- Pack and Pour: Tightly pack your prepared cucumbers into the jars, filling them as much as you can without crushing them. Aim to get as many cucumbers into each jar as possible to maximize your pickle yield. Once the jars are packed with cucumbers, carefully pour the slightly cooled brine over them. Ensure the brine completely covers the cucumbers. Leave about ½ inch of headspace at the top of each jar. This headspace is important for proper sealing and to prevent the brine from overflowing when the jars are sealed. Gently tap the jars on the counter a few times to release any trapped air bubbles. If the brine level drops below the cucumbers after tapping, you can add a little more brine or water to ensure everything is submerged.
- Refrigerate and Enjoy: Once your jars are filled and sealed, allow them to cool at room temperature for about an hour. This allows the flavors to begin mingling before they hit the cold. After the cooling period, place the jars in the refrigerator. Your refrigerator garlic dill pickles will be ready to enjoy in as little as 24-48 hours, though their flavor will continue to deepen and improve over the next few days. They will keep in the refrigerator for several weeks, typically 3-4 weeks, but their best flavor and crunch are usually within the first couple of weeks. Shake the jars occasionally, especially in the first few days, to help distribute the flavors. You’ll be amazed at how simple it is to create these delicious, homemade pickles that are far superior to most store-bought varieties.
These refrigerator pickles are a testament to how easy and rewarding homemade food can be. The combination of crisp cucumbers, tangy brine, pungent garlic, and aromatic dill creates a flavor profile that’s hard to resist. They are a fantastic way to use up a bounty of cucumbers and have a flavorful condiment always on hand. Experiment with adding other spices like mustard seeds or coriander seeds to the brine for variations. Enjoy your delicious, homemade garlic dill pickles!
Conclusion:
Congratulations! You’ve learned how to make delicious refrigerator garlic dill pickles right in your own kitchen. This recipe is a fantastic way to enjoy a classic flavor with minimal effort. The beauty of these pickles lies in their simplicity and the vibrant, fresh taste that comes from using quality ingredients like crisp cucumbers, aromatic garlic, and pungent dill. Unlike canned pickles, these refrigerator pickles maintain a satisfying crunch and a bright, tangy profile that’s perfect for any occasion. They’re an absolute game-changer for snacking, adding a zesty kick to sandwiches, burgers, and wraps, or even as a refreshing side dish to your favorite meals.
Feeling adventurous? You can easily customize this recipe! Try adding a pinch of red pepper flakes for a little heat, or experiment with other herbs like mustard seed or coriander for a different flavor dimension. The possibilities are endless! So don’t hesitate – gather your ingredients and dive into making your own batch of refrigerator garlic dill pickles. I promise you’ll be delighted with the results!
Frequently Asked Questions:
Q: How long do these refrigerator garlic dill pickles last?
A: Properly stored in the refrigerator, these pickles will stay fresh and delicious for about 2-3 weeks. Make sure they are submerged in brine and kept in an airtight container.
Q: Can I use different types of cucumbers for this recipe?
A: While pickling cucumbers are ideal due to their firm texture and fewer seeds, you can also use Kirby or English cucumbers. Just be sure to slice them uniformly for even pickling. Avoid slicing them too thin, as they might become mushy.
Q: My pickles aren’t very crunchy. What did I do wrong?
A: A lack of crunch can be due to a few things. Ensure you’re using fresh, firm cucumbers. Some people add a grape leaf or a small piece of horseradish root to the jar, as they contain tannins that can help firm up the pickles. Also, make sure your brine is sufficiently acidic with enough vinegar.
Refrigerator Garlic Dill Pickles
Quick and easy refrigerator pickles with a garlicky dill flavor, perfect for snacking or as a condiment. These pickles are not canned and must be stored in the refrigerator.
Ingredients
-
2 lbs kirby or other pickling cucumbers
-
2 cups unfiltered untreated water
-
1 cup 5% white vinegar
-
1 tablespoons pickling salt
-
2 cloves garlic, peeled
-
4 sprigs fresh dill per jar
-
1 teaspoon black peppercorns
-
1/2 teaspoon hot pepper flakes
Instructions
-
Step 1
Wash cucumbers thoroughly and trim off the blossom ends. Cut cucumbers into desired shapes (spears, slices, or leave whole if small). -
Step 2
In a saucepan, combine water, white vinegar, and pickling salt. Heat gently, stirring until the salt is dissolved. Let the brine cool slightly. -
Step 3
In clean quart jars, place peeled garlic cloves, dill sprigs, black peppercorns, and hot pepper flakes. -
Step 4
Pack the cucumber pieces tightly into the jars, filling them as much as possible without crushing. -
Step 5
Pour the cooled brine over the cucumbers, ensuring they are completely submerged. Leave about 1/2 inch of headspace. -
Step 6
Seal the jars tightly with lids and let them sit at room temperature for 24 hours before refrigerating. They will be ready to eat after 24 hours but will develop more flavor over a few days.
Important Information
Nutrition Facts (Per Serving)
It is important to consider this information as approximate and not to use it as definitive health advice.
Allergy Information
Please check ingredients for potential allergens and consult a health professional if in doubt.