Easy Restaurant Style Blender Salsa Recipe
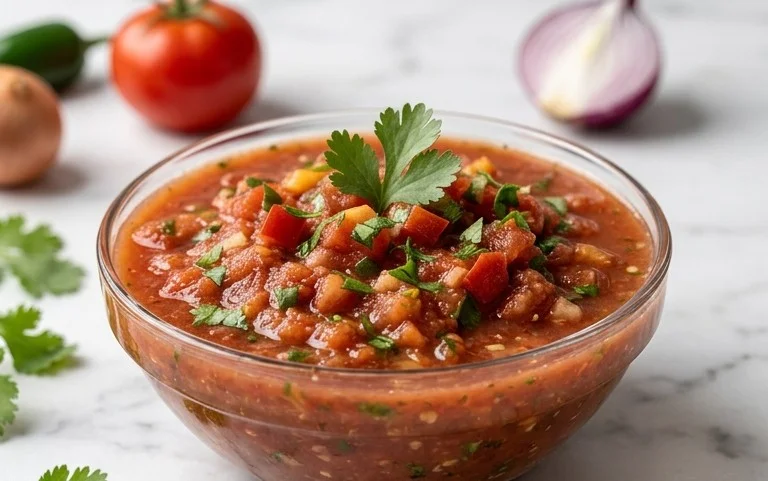
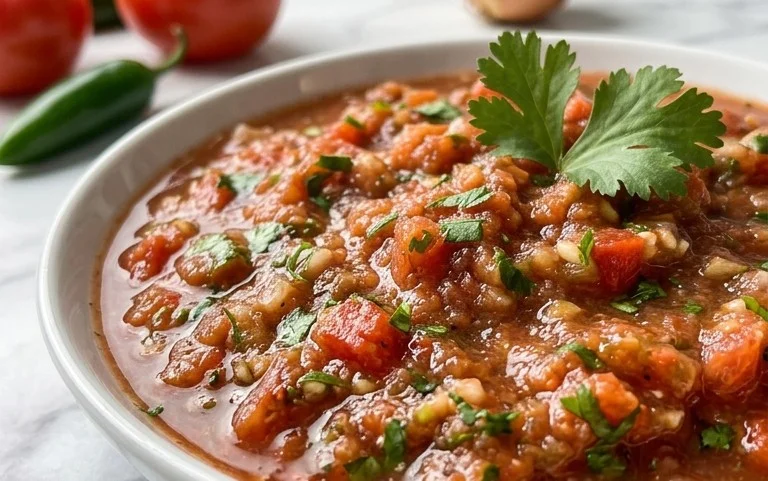
Easy Restaurant Style Blender Salsa is about to become your new go-to dip. Forget those store-bought jars that just don’t capture that vibrant, fresh flavor. We’ve all been there, craving that perfectly balanced, slightly chunky, incredibly delicious salsa you get at your favorite Mexican restaurant. The good news? You can recreate that magic in your own kitchen with minimal effort! What makes this particular Easy Restaurant Style Blender Salsa so special is its simplicity and incredible speed. No chopping required, just toss everything into the blender, pulse a few times, and voilà – you have a batch of restaurant-quality salsa ready to elevate your taco nights, nacho platters, or even just a casual snack. It’s the taste of pure, unadulterated freshness that brings people together, and I can’t wait for you to experience it.
Easy Restaurant Style Blender Salsa
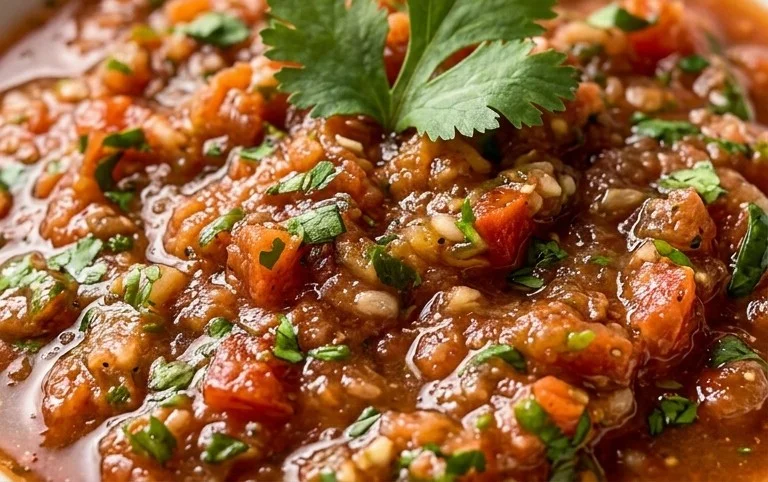
There’s nothing quite like fresh, vibrant salsa. The kind you get at your favorite Mexican restaurant, bursting with flavor and the perfect balance of spice and tang. For years, I’ve tried to replicate that magic at home, often with mixed results. Some store-bought salsas are bland, others are too watery, and homemade versions sometimes end up tasting… well, just like chopped tomatoes. But then, I discovered the blender method, and it was a game-changer! This Easy Restaurant Style Blender Salsa recipe is incredibly simple, requiring minimal effort but delivering maximum flavor. It’s the perfect accompaniment to tortilla chips, tacos, enchiladas, or even just a dollop on your morning eggs. Forget those pricey jars; you can whip up a batch of this delicious salsa in mere minutes. The key is using quality ingredients and letting the blender do the work to emulsify everything into that wonderfully smooth, yet still textured, consistency we all love.
Ingredients:
- 2 (15 oz.) cans fire-roasted diced tomatoes
- 1/2 red onion, roughly chopped
- 3-4 cloves smashed garlic
- 1 jalapeno, ribs and seeds removed
- 1 cup fresh cilantro leaves
- juice of 2 limes
- 1/2 teaspoon cumin
- pinch cayenne pepper
- a couple large pinches Kosher salt
- large pinch fresh cracked pepper
Cooking Instructions
This recipe is all about combining everything in a blender and letting it work its magic. The beauty of this method is how it breaks down the ingredients just enough to meld the flavors without turning it into a completely smooth puree. We want some delightful texture!
1.
Preparing Your Ingredients
Before we even think about blending, it’s important to do a little prep. Start by opening your two cans of fire-roasted diced tomatoes. Fire-roasting adds an incredible depth of smoky flavor that’s essential for that authentic restaurant taste. Drain off about half of the liquid from one can; we don’t want our salsa to be too watery. You can reserve the drained liquid for another use if you like, or just discard it. Next, roughly chop your red onion. A medium red onion will do the trick. You don’t need to be precise here, as the blender will take care of the rest, but roughly chopping it helps it blend more easily. Peel and smash your garlic cloves. Smashing them with the side of a knife makes them easier to peel and also releases their pungent aroma and flavor, which is crucial for a well-rounded salsa. For the jalapeno, this is where you can control the heat. I recommend removing the ribs and seeds entirely for a milder salsa. If you love a good kick, leave some of the ribs in, or even include a small portion of the seeds. Slice the jalapeno into a few pieces. Finally, give your fresh cilantro a good rinse and gently pat it dry. You’ll want the leaves and tender stems – this is where a lot of that bright, fresh flavor comes from.
2.
Loading the Blender
Now for the fun part! It’s time to get everything into your blender. I highly recommend using a high-powered blender for the best results, but a standard blender will also work. Start by adding the roughly chopped red onion and the smashed garlic to the bottom of the blender jar. Then, add your prepared jalapeno pieces. Next, add the drained fire-roasted diced tomatoes. Don’t be afraid to add a little of the juice from the second can if it seems too dry; just avoid drowning it in liquid. Tuck in your fresh cilantro leaves. Now, it’s time for the seasonings. Sprinkle in the cumin, which adds a warm, earthy note that’s characteristic of great salsa. Add a pinch of cayenne pepper for an extra layer of heat and complexity – remember, you can always add more later if you want it spicier. Finally, add a couple of generous pinches of Kosher salt and a good pinch of fresh cracked black pepper. Salt is a flavor enhancer, so don’t be shy! The lime juice will come next.
3.
Blending to Perfection
This is where the magic happens. Secure the lid on your blender. You’ll want to start by pulsing the ingredients a few times. This helps to break down the larger pieces and distribute everything evenly. After pulsing, begin to blend on a low to medium speed. We’re not going for a completely smooth puree here. The goal is to achieve a texture that’s somewhere between chunky and smooth, with just enough body to cling to your chips. Blend until you see the ingredients have been well incorporated and the salsa has reached your desired consistency. This usually takes about 30-60 seconds, depending on your blender. Stop and scrape down the sides of the blender jar with a spatula if needed, to ensure everything gets blended evenly. Be careful not to over-blend, or you’ll end up with a thin, watery sauce rather than a delicious salsa.
4.
Adding the Citrus and Final Seasoning
Once you’ve achieved your desired texture, it’s time to add the bright, zesty element that really elevates this salsa: fresh lime juice. Squeeze the juice of two fresh limes directly into the blender. The acidity of the lime juice will cut through the richness of the tomatoes and onions, adding a wonderful freshness and tang that is absolutely vital for authentic salsa. Secure the lid again and give the salsa a quick blend for just a few more seconds. This incorporates the lime juice without overworking the other ingredients. Now comes the most important tasting and adjusting phase. Taste your salsa! Does it need more salt? More lime? A little more heat from cayenne? This is your chance to make it perfect for your palate. Add more salt, pepper, lime juice, or cayenne pepper to your liking, giving it a final quick pulse to combine.
5.
Resting and Serving
While you can certainly enjoy this salsa immediately, I highly recommend letting it rest in the refrigerator for at least 15-30 minutes, or even better, for an hour or two. This resting period allows the flavors to meld and deepen. The ingredients will continue to marry, creating a more complex and nuanced taste. This is a crucial step for achieving that truly restaurant-quality flavor. When you’re ready to serve, give it a good stir. You’ll notice the salsa might thicken slightly as it chills, which is perfect. Serve it in a nice bowl with your favorite tortilla chips. This salsa is incredibly versatile and will be the star of any gathering, or a simple, delicious addition to any meal. Enjoy the fruits of your easy labor!
Conclusion:
And there you have it – your very own easy restaurant style blender salsa, ready to elevate any meal or snack! This recipe is a game-changer because it’s incredibly simple, requires minimal effort thanks to your blender, and delivers a vibrant, fresh flavor that rivals your favorite taqueria’s. No more sad, pre-packaged dips; you’re just moments away from pure salsa perfection. The beauty of this recipe lies in its versatility. Serve it with warm tortilla chips for the ultimate appetizer, spoon it over tacos and burritos, dollop it on grilled chicken or fish, or even use it as a flavorful base for a zesty salad dressing. Don’t be afraid to get creative with variations! Want a spicier kick? Add an extra jalapeño or a pinch of cayenne. Prefer a smoky flavor? Toss in a chipotle pepper in adobo sauce. For a touch of sweetness, a diced mango or pineapple can be a delightful addition. I truly encourage you to give this recipe a try. It’s so satisfying to make something so delicious from scratch with so little fuss. You’ll be making this easy restaurant style blender salsa again and again!
Frequently Asked Questions:
Q: How long will this blender salsa last in the refrigerator?
This fresh salsa is best enjoyed within 3-5 days when stored in an airtight container in the refrigerator. The flavors will continue to meld over time, but it’s ideal to consume it within the first few days for the freshest taste.
Q: Can I adjust the consistency of the salsa?
Absolutely! If you prefer a chunkier salsa, pulse the ingredients in the blender instead of blending continuously until smooth. For a thinner salsa, you can add a tablespoon or two of water or lime juice until you reach your desired consistency.
Easy Restaurant Style Blender Salsa
A quick and easy blender salsa that mimics your favorite restaurant style. Perfect for dipping or as a topping.
Ingredients
-
2 (15 oz.) cans fire-roasted diced tomatoes
-
1/2 red onion, roughly chopped
-
3-4 cloves smashed garlic
-
1 jalapeno, ribs and seeds removed
-
1 cup fresh cilantro leaves
-
juice of 2 limes
-
1/2 teaspoon cumin
-
pinch cayenne pepper
-
a couple large pinches Kosher salt
-
large pinch fresh cracked pepper
Instructions
-
Step 1
Drain the cans of fire-roasted diced tomatoes, reserving a tablespoon of the liquid if you prefer a thinner salsa. -
Step 2
Add the drained tomatoes, roughly chopped red onion, smashed garlic, and deseeded jalapeno to a blender or food processor. -
Step 3
Add the fresh cilantro leaves, lime juice, cumin, cayenne pepper, Kosher salt, and fresh cracked pepper. -
Step 4
Pulse the ingredients until the salsa reaches your desired consistency. For chunkier salsa, pulse fewer times. For smoother salsa, blend longer. -
Step 5
Taste and adjust seasonings as needed. Add more salt, pepper, or lime juice to your preference. -
Step 6
For best flavor, transfer the salsa to an airtight container and refrigerate for at least 15-30 minutes to allow the flavors to meld before serving.
Important Information
Nutrition Facts (Per Serving)
It is important to consider this information as approximate and not to use it as definitive health advice.
Allergy Information
Please check ingredients for potential allergens and consult a health professional if in doubt.