Quick & Easy Jalapeno Pepper Jelly Recipe
Jalapeno Pepper Jelly Recipe – Quick & Easy Instructions! Looking for that perfect sweet and spicy kick to elevate your cheese boards, sandwiches, or even grilled chicken? You’ve come to the right place! This Jalapeno Pepper Jelly recipe is a game-changer, and I’m thrilled to share how incredibly simple it is to whip up a batch. Forget those store-bought options with their mystery ingredients; homemade is where the magic truly happens, and this Jalapeno Pepper Jelly is proof. People absolutely adore this condiment because it strikes that magical balance between vibrant, fresh pepper flavor and a delightful sweetness, all with a satisfying warmth that lingers just right. What makes it truly special is its versatility. It’s not just a topping; it’s an experience, transforming the ordinary into something extraordinary with every spoonful. Ready to impress yourself and your guests? Let’s get started on this delightful Jalapeno Pepper Jelly!

Spicy Sweet Jalapeno Pepper Jelly: A Quick & Easy Recipe!
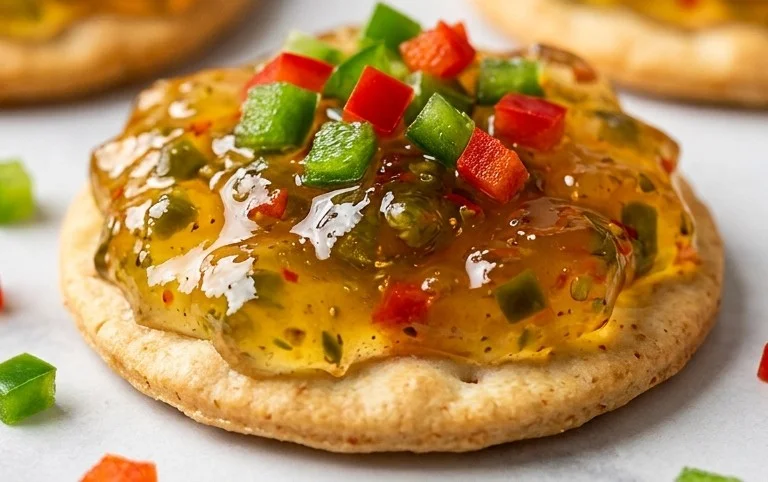
There’s something incredibly satisfying about homemade preserves, and this Jalapeno Pepper Jelly is a true crowd-pleaser. It strikes that perfect balance between sweet and spicy, making it a versatile condiment that elevates everything from cream cheese and crackers to grilled chicken and beef. The best part? This recipe is surprisingly quick and easy to make, perfect for even beginner canners or those looking for a fast weekend project. Forget those complicated canning books; we’re keeping it simple and delicious.
Imagine the vibrant color, the tantalizing aroma, and the burst of flavor with every bite. This jelly is not just a recipe; it’s an experience. It’s the perfect way to preserve the bounty of fresh peppers, turning them into a pantry staple that brings a little zing to your life. So, let’s get our aprons on and dive into creating this delightful Jalapeno Pepper Jelly!
Ingredients:
- 2 large red bell peppers
- 10-12 large jalapenos
- 1 ½ cups apple cider vinegar (you can use white vinegar if that’s what you have on hand)
- 6 cups of granulated sugar
- 1.5 pouch of liquid pectin
- 1 tsp salt
Prepping Your Peppers
The first step to achieving a beautifully smooth and flavorful jelly is to properly prepare your peppers. You’ll want to wash both the red bell peppers and the jalapenos thoroughly under cool running water. For the red bell peppers, cut them in half, remove the stems, seeds, and white membranes. We’re aiming for just the vibrant red flesh. For the jalapenos, the seeds and membranes are where a lot of the heat resides. If you prefer a milder jelly, you’ll want to remove as many of these as possible. If you love a good kick, leave some of the seeds in! Always wear gloves when handling jalapenos to avoid that uncomfortable burning sensation on your hands.
Once prepped, you’ll need to finely chop both the red bell peppers and the jalapenos. A food processor is your best friend here. Pulse them until they are very finely minced. You want them small enough to cook down and blend into the jelly mixture easily. Aim for a texture that’s almost like a paste, but with tiny flecks of pepper visible. The red bell peppers will contribute a beautiful color and a subtle sweetness, while the jalapenos will provide that characteristic spicy punch.
Cooking the Jelly
Now for the magic to happen! In a large, heavy-bottomed pot or Dutch oven, combine your finely chopped red bell peppers and jalapenos, the apple cider vinegar, and the salt. The heavy-bottomed pot is crucial because it helps to distribute heat evenly and prevents scorching, which can happen quickly when you’re dealing with sugar. Bring this mixture to a rolling boil over high heat, stirring constantly to ensure nothing sticks to the bottom. Let it boil vigorously for about 10 minutes. This initial boil helps to soften the peppers and meld their flavors with the vinegar.
After the initial 10-minute boil, it’s time to add the sugar. This is where the transformation really begins. Gradually stir in the 6 cups of granulated sugar, mixing it thoroughly until it’s completely dissolved. Once the sugar is dissolved, bring the mixture back to a full rolling boil. This type of boil cannot be stirred down. Continue to boil this mixture for exactly 1 minute, stirring constantly. This precise timing is important for achieving the right set in your jelly.
The next crucial step is adding the liquid pectin. Stir in the contents of the 1.5 pouch of liquid pectin. Once the pectin is added, bring the mixture back to a full rolling boil and boil vigorously for 1 minute, stirring constantly. Again, this rolling boil is key. The pectin, when activated by heat and sugar, is what gives your jelly its characteristic jiggly texture.
Testing for Set and Jarring
After the final 1-minute boil, remove the pot from the heat. Now comes the exciting part: testing for the jelly’s set. You can use a candy thermometer or the “cold plate” test. For the cold plate test, place a few small plates in your freezer before you start cooking. When you remove the jelly from the heat, spoon a small amount onto one of the chilled plates. Let it sit for about 30 seconds to a minute. Then, gently push the edge of the jelly with your finger. If it wrinkles, it’s ready to set. If it’s still runny, return the pot to the heat and boil for another minute, then test again. Repeat this process until your jelly reaches the desired set. Be patient; this step ensures you don’t end up with runny jelly!
Once your jelly has reached the correct set, carefully skim off any foam that may have formed on the surface using a spoon. This will give your jelly a clearer, more professional appearance. Ladle the hot jelly immediately into sterilized jars, leaving about ¼ inch headspace. Sterilizing your jars is a vital step for safe canning. You can do this by washing them in hot, soapy water and then placing them in a pot of boiling water for at least 10 minutes. Wipe the rims of the jars clean with a damp paper towel to ensure a good seal. Place the sterilized lids and rings on the jars, screwing them on fingertip-tight.
Process the filled jars in a boiling water bath for 10 minutes (adjusting for altitude if necessary). Carefully remove the jars from the water bath and let them cool completely on a wire rack undisturbed for 12-24 hours. You should hear the satisfying “ping” as the lids seal. Once cooled, check that the lids are firmly sealed by pressing down on the center. If a lid flexes, that jar has not sealed properly and should be refrigerated and consumed within a few weeks. Store your perfectly set Jalapeno Pepper Jelly in a cool, dark place, and enjoy its spicy-sweet goodness!
Conclusion:
And there you have it! You’ve successfully learned how to make this incredibly delicious Jalapeno Pepper Jelly recipe with quick and easy instructions. What makes this recipe truly fantastic is its perfect balance of sweet and heat, transforming ordinary appetizers into something truly special. It’s surprisingly simple to whip up, proving that gourmet-tasting treats don’t need to be complicated. I’m so excited for you to try it and experience the magic for yourself!
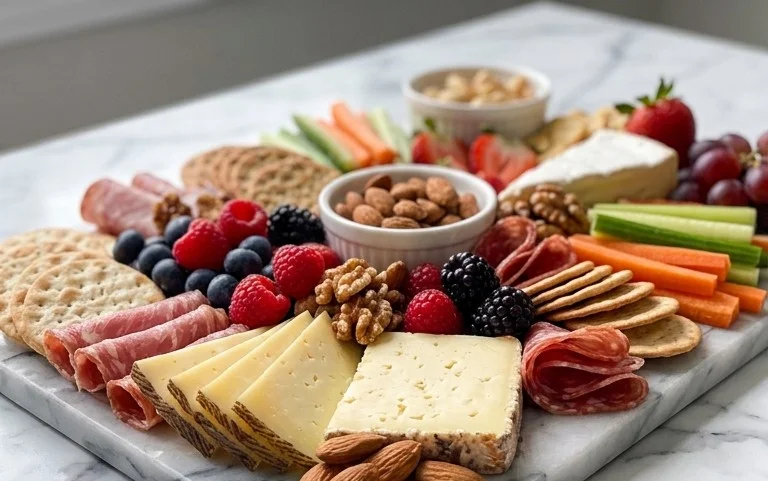
The possibilities for enjoying this versatile jelly are endless. Imagine serving it alongside a cheese board, spreading it on crackers with cream cheese, or using it as a glaze for chicken or beef. It’s also a phenomenal accompaniment to breakfast items like toast or biscuits. Don’t be afraid to experiment with different cheeses, breads, and proteins – this jalapeno jelly is a game-changer!
For those who enjoy a little extra adventure, consider adding a pinch of smoked paprika for a smoky undertone or a dash of ghost pepper powder for an intense kick (use with extreme caution!). You could also try incorporating other sweet fruits like peaches or pineapple for a unique twist. I truly encourage you to get into your kitchen and give this recipe a go. You won’t regret the burst of flavor it brings!
Frequently Asked Questions:
How long does Jalapeno Pepper Jelly last?
When stored properly in sterilized airtight jars in a cool, dark place, your homemade jalapeno pepper jelly can last for up to a year. Once opened, refrigerate it and it should be good for several weeks.
Can I adjust the spice level of the Jalapeno Pepper Jelly?
Absolutely! The beauty of this recipe is its adaptability. For less heat, remove the seeds and membranes from the jalapenos before chopping. For more heat, you can leave some in or even add a small amount of a hotter pepper.
What’s the best way to store it before gifting?
For gifting, ensure your jars are properly sterilized and sealed. You can then tie a festive ribbon around the lid. Labeling it with the ingredients and the “best by” date is also a thoughtful touch.
Jalapeno Pepper Jelly Recipe – Quick & Easy Instructions!
A simple and quick recipe for delicious jalapeno pepper jelly, perfect for appetizers and snacks.
Ingredients
-
2 large red bell pepper
-
10-12 large jalapenos
-
1 ½ cups apple cider vinegar
-
6 cups of sugar
-
1.5 pouch of liquid pectin
-
1 tsp salt
Instructions
-
Step 1
Wash and core the red bell peppers and jalapenos. Remove seeds and membranes from jalapenos for less heat. Finely chop peppers. -
Step 2
Combine chopped peppers and apple cider vinegar in a large saucepan. Bring to a boil over medium-high heat, then reduce heat and simmer for 10 minutes. -
Step 3
Stir in the sugar and salt. Bring the mixture back to a rolling boil, stirring constantly. -
Step 4
Add the liquid pectin and stir well. Continue boiling for 1 minute, stirring constantly. -
Step 5
Remove from heat. Skim off any foam from the surface. -
Step 6
Ladle the hot jelly into sterilized jars, leaving about 1/4 inch headspace. Wipe rims clean and secure lids. -
Step 7
Process in a boiling water bath for 10 minutes. Remove jars and let cool completely.
Important Information
Nutrition Facts (Per Serving)
It is important to consider this information as approximate and not to use it as definitive health advice.
Allergy Information
Please check ingredients for potential allergens and consult a health professional if in doubt.